
Soffit Vent Installation – How to Install a Soffit Vent
Installing a soffit vent can be a quick and easy process if you have the right tools and a little patience. Whether you’re trying to save energy by letting more air circulation into your attic, or updating an older home to be more eco-friendly, installing a new soffit vent can help you save money and increase your home’s resale value. Before beginning any project, you’ll want to make sure that you have all the proper tools and equipment handy. Since this does typically involve reaching up to high places near your roof’s overhang, you may want a ladder and a friend or family member who can help you keep steady on the ladder. Even on the most simple and straightforward job you’ll want to proceed with caution and take all necessary safety steps. Let’s check out what we recommend for the tools and supplies you will need in order to safely and securely install your new vent.
Tools Needed:
- Ladder (depending on the height of your roof overhangs)
- Safety glasses or goggles
- Work gloves
- Large piece of flat cardboard (approximately 10 inches by 16 inches, depending on the size of your soffit vent)
- Sturdy construction scissors or craft scissors or a utility knife (for cutting the cardboard jig)
- Construction pencil or chalk for marking and outlining
- Electric jigsaw or small compass saw
- Power drill or hand operated drill
- Drill bit size: ¼”
- Screwdriver bit for the drill or manual screwdriver. Typically Phillips head
- Six to ten ½” sheet metal or wood screws (you want a few extra in case they fall or break)
- Ruler or measuring tape
- Silicone calk and calking gun (one to two tubes)
Safety First
We always recommend starting every job off by gathering all of your necessary tools and by equipping your safety goggles and work gloves. Every job could be made safer by having safety goggles just in case, however, installing a new soffit vent requires you to be drilling and cutting wood directly over your head, which can lead to dust and debris falling in your face and eyes. The eyes are typically the hardest part of your body to get to heal properly after an injury and the risk of blindness is very high when they are injured, which is why eye safety is always a top priority with any DIY household job.
Getting Started: Assemble your cardboard jig
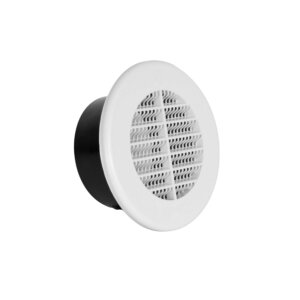
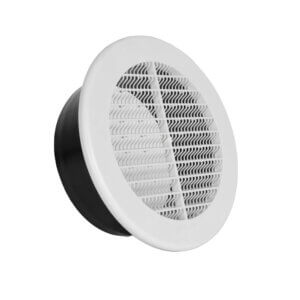
Gather your supplies in your garage or a clear area in your lawn near your house in a safe area. Take your cardboard and place it on a table and place your vent over it. Trace an outline of the vents you’d like to use. We recommend either a 6×16 inch or 8×16 inch galvanized vent with a screen which we sell on our site for about $8.00 each. The 6 or 8 inch larger sizes make sure that you are getting adequate ventilation intake into your attic per each vent installed around the soffit. It’s important to have an adequate balance of intake vs exhaust in your house’s ventilation system. Further on in the article we will provide tips on how to determine how many soffit vents you may need to install to balance your ventilation intake properly. We recommend a vent that has a built in screen on the inside as well, in order to help keep insects and particulate matter out of your attic.
Once you have traced the outline of your vent on the cardboard piece, take your scissors and cut out the traced shape. Then, with your measuring tape or ruler, measure 1 of an inch from one long edge toward the middle of the cardboard and draw another line. Do this with the narrow edge as well. You should end up with two lines on the inside of your cardboard rectangle shape that are 1 inch from the outer edges. Cut along those lines so that your final cardboard shape is exactly the same size as your vent, but 1 inch smaller. That is your jig which will guide your measurements for your cuts into your soffit later.
Setting up: Trace cut locations
Put on your safety goggles and work gloves and bring your ladder (if necessary) to your desired installation location along the side of your house. Look at the underside of your soffit and place your measuring tape tip on the outer wall of your house and extend the tape to measure the width of your soffit. Overhangs are typically between 12 to 18 inches wide. The center should be between 6 and 9 inches from your house’s outer wall. Mark a place that indicates the center with your pencil and place the cardboard jig over it, centering and straightening it as you go. Observe the spaces between rafters in the overhang. Those will be indicated by a few nails securing the soffit material to the roof rafters. Make sure your jig is between two rafters and does not overlap them. This is important because you do not want to cut or damage your roof’s rafters with a jigsaw during installation. It is best to undersize the jig by 1” width and 1.5” length, so for 6”x16” on center rafters, your jig should be 5”x14.5”.
Hold your cardboard jig up and trace a clear outline with your carpenter’s pencil or chalk. Repeat this process along the overhang of your house until you have successfully traced all of the installation points you would like to do in this project.
Drill starter holes
The next step is to take your power drill, using at least a ¼“ drill bit, and drill a hole at the four corners of each of your pencil outlines. Feel free to use a slightly larger bit as well. Just make sure to favor the inside of the rectangle rather the outside as we don’t want to create a hole that your vent may not cover once installed.
Cut out the jig shapes
Take your saw, either a powered jigsaw or a manual compass saw and insert it in one of the holes you drilled at the corner of the rectangle shape. Cut along the lines until each part of the rectangle drops free. Take your soffit vent and hold it up to the hole you just cut. Make sure that the vent covers the entire hole and that there is about ½ an inch of wood on each side of the wood on the inside of the vent’s inner area so that you have plenty of room to affix the screws. Once you have ensured that your jig holes are the correct size, continue to cut out the remaining rectangles with your saw. If you need to be on a ladder for this, make sure that you have a safety buddy that can hold the ladder steady for you and that you can hand tools to as you adjust yourself on the ladder.
Bonus tip: Once your holes are cut, check around the inner edges and directly above the cutout looking into the interior of the roof housing. Make sure that there is an adequate amount of air flow between where your vent will be and the insulation material in your attic. If not, then you may have to cut a hole or path in the insulation in order to free up a proper air flow.
Coat the soffit vent outer edges with silicone caulk
Covering the outer edges of your vent is important in keeping bugs and debris like sand and water out of your attic as well. An airtight seal can ensure that your attic stays well ventilated and free of unwanted heat and moisture buildup for years to come.
Take your caulking gun and run a line of silicone along the outer edges of your vent, then carefully lift it up to your freshly cut hole and hold it there. Make sure that you do not put too much silicone along the edges or too close to the outer edge so that you have a lot of spillage over the sides. We just want a tight seal on the very outer edges of each vent so they are flush with the wood in your overhang.
Secure each vent with screws
Each soffit vent should have between 8 and 10 holes drilled along the outer edges for screws to go. We recommend ½ inch stainless steel sheet metal screws for each vent. Very important: When securing the vents, make sure that the louvers are angled toward your house and not away from your house. When you look up at an installed vent from the ground, you should not be able to see into the angled slats in the vent. This helps keep dust and rainwater and smoke from being sucked up into the roof of your house. Make sure that all of your vents are oriented the proper way before securing.
Secure the outer four corners first with your screws and then you can safely screw in the remaining inner screws without having to brace the sides of the vent.
Check that each vent is secure and properly sealed
Go around and push and attempt to jiggle each installed vent with your hand after all of the screws have been tightened the first time. If you feel any give or play in the vent, you may need to tighten or replace your screws. If you choose to paint your soffit vents, remove any oil residue and carefully sand the surface with scotch brite or steel wool to get the best bond.
Enjoy your newly vented house
Once your vents have been properly installed, you can breathe easily now that the job is done properly, and your house can too! These vents are important to the overall health and upkeep of your house and especially the roof, which can lead to costly repairs in the future if not properly maintained.
Bonus: Calculating how many soffit vents your house needs
As per the International Residential Code Guide, Chapter 8, Section R806: “The minimum net free ventilating area shall be 1/150th of the area of the vented space.” (In some climates, this is 1/300th instead due to reduced moisture and temperatures. Check your current climate zone to see which applies to you).
This means that you need to add up the square footage of your attic, including garage, to calculate this number. Then divide that number by 150 to get the total area you need to have ventilated. Since we’re only worried about the intake vents which we are installing into the soffit of our house, we only need half that amount, so divide that number by 2. Now, take that number and multiply it by 144 to get the total number of net free inches that you need to account for in your intake ventilation around your house. Then, look at the size of soffit vents you want to install. A typical vent measuring 16” x 8” gives you a total of 65 square inches of net free ventilating area (NFA). So, take the last number you calculated out and divide that by 65 to get the number of soffit vents you need to install. Now, that wasn’t so hard, was it? Here’s an example in visual form:
Step 1: Find your total attic square footage
House SQF: 2,200 + Garage SQF: 480 = 2,680 Attic SQFStep 2: Divide that number by 150
Attic SQF: 2,680 / 150 = 17.87 SQF (Equals the total amount of ventilation space for both intake and exhaust)Step 3: Figure out the exhaust square footage needed
17.87 / 2 = 8.9Step 4: Multiply the exhaust SQF by 144 to get the total square inches
8.9 X 144 =1,286.4Step 5: Divide that by 36 (which is the NFA provided by a single 16” x 8” vent) to get the total number of vents needed to be code compliant
1,268.4 / 36 =35.2 vents total around your house.
We did the math
So, in this case, after we did the math, we would need 35.2 or 36 actual vents around our house, or about 9 along each of the four sides of the house. In some climates, that would only call for 18 total, so check which climate zone you live in first. And there you have it! A pretty easy and quick way to determine just how many soffit vents you need to have and install around your house.
Thanks for reading and for more information or to purchase a soffit vent, please click here or call our sales line here: 1-800-234-1903.